Wednesday, December 30, 2015

How to apply css to a web part in share point 2013/Office 365


How to apply css to a particular web part in share point 2013/ office 365 using share point designer 2013

you need to find a web part id in order to apply css to that particular web part.

open that page right click on the page select View page source

search for MSOZoneCell_WebPartWPQ and there will be an id associated with it. for example,

MSOZoneCell_WebPartWPQ2, MSOZoneCell_WebPartWPQ3 etc so lets consider you want to apply css to the web part having id MSOZoneCell_WebPartWPQ2


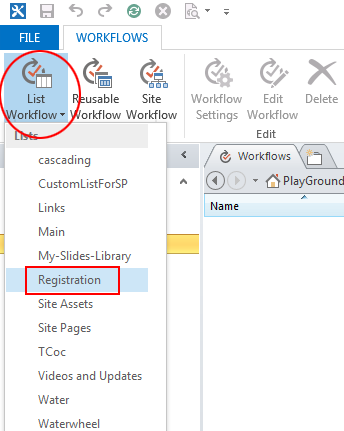
Now, edit that page with share point designer 2013


Open page with advanced mode.


search for this code:


after

.s4-ca{margin-left:0px;
}

copy paste following code (remember, you can always change it as per your need !)

#MSOZoneCell_WebPartWPQ2 .ms-webpart-chrome-title
{
background: rgba(73,155,234,1);
background: -moz-linear-gradient(left, rgba(73,155,234,1) 0%,
rgba(255,255,255,1) 100%);
background: -webkit-gradient(left top, right top, color-stop(0%,
rgba(73,155,234,1)), color-stop(100%, rgba(255,255,255,1)));
background: -webkit-linear-gradient(left, rgba(73,155,234,1) 0%,
rgba(255,255,255,1) 100%);
background: -o-linear-gradient(left, rgba(73,155,234,1) 0%, rgba(255,255,255,1)
100%);
background: -ms-linear-gradient(left, rgba(73,155,234,1) 0%, rgba(255,255,255,1)
100%);
background: linear-gradient(to right, rgba(73,155,234,1) 0%, rgba(255,255,255,1)
100%);
filter: progid:DXImageTransform.Microsoft.gradient( startColorstr='#499bea',
endColorstr='#ffffff', GradientType=1 );
font-size: 15px;  
font-weight: bold;
color: white;
padding: 5px 5px;
border: 0.1em yellow;
 border-top-left-radius: 1em;
-moz-border-radius: 0.3em;
-webkit-border-radius: 0.3em;
display:block;
//your css styling goes here
}
save and click on preview in browser . you are done !

here is the result-


Friday, August 14, 2015

Trek to Sandhan Valley- My Experience

Its Monsoon, its time for Trekking, having fun in the rains in the midst of nature. A time all the Trekking enthusiasts wait for. Its that time of the year where we wait for weekends just to discover a new trekking route, a new adventure and to have fun in the waterfalls on the trekking route.

Click here  to check out my review about trek to Sandhan Valley, Nashik, India.
Happy trekking! 


Thursday, September 18, 2014

Workflow to send/receive email notification in Share Point 2010 / 2013


hello everyone,

You need to read and know about intro to workflow , lookup , impersonation before getting started. Let's talk about the share point workflow.I have observed there are very few posts about how to create a workflow using Share Point Designer.


today we will see how to create a workflow to send an Email notification to the user/customer.just follow below steps and you can easily learn about creating a workflow in share point.
    first of all create a list.
          For example, i created a list called Registration
          Create 3 fields Title , EmpID and EmpName

    • Open Share Point Designer 2010/2013
    • go to workflows, click on 'list workflow' select the list name 'Registration'
    • see image below for your reference 


    • Name your workflow. you can give any name you want. i have named it as "Registrationwrkflow"


    • now you need to create something like this. for this , you must know about lookup and impersonation steps in SharePoint Designer.(Sorry ,but you must learn it on your own !)


          we are almost there, just few steps and you are done.*

    • after creating workflow, click on 'save'   
    • go to the workflow start options. your settings should look like below image.


    and then 'publish' your workflow.Keep in mind, workflow can not start unless you 'publish' it.
    try to add an item and check for workflow status (you can enable workflow status column from list settings > views> all items> workflow name).


    *Note-To test the workflow, you can put your email id  in "mail" option so that you can get a notification.

    have fun !


    Wednesday, July 23, 2014

    How to reduce extra space between web parts in share point .

    blog 3 :

    hello everyone !


    people working on share point 2013, have you ever noticed there is a extra space between two web parts ? 

    annoying , isn't it !? well ,we have a solution for that. just a little CSS  code and you can reduce that extra space very easily. lets start !

    Problem: reduce space/gap between two web parts. 


    Solution :  


    a. Add a content editor Web Part(CWEP) to your page. (if you don't know how to add content editor, click here)
    b. paste the following code into the HTML Editor ,and you are done!


    <style type="text/css">
         .ms-webpartPage-root {
             border-spacing: 0px !important;
         }
           .ms-webpartzone-cell {
             margin: 0px !important;
         }
    </style> 

    Sunday, July 13, 2014

    Remove Left Navigation Panel SharePoint

    hello again!

    Some times we need to customize the SP site design according to customer requirements.hiding or removing the left navigation bar is one of them. following few simple steps will make it easier for you to do the same. So lets get started ! 


    problem : hide / remove left navigation bar/ panel from share point site page.


    solution

    1. for Share Point 2010

    a. Add a content editor Web Part(CWEP) to your page. (if you don't know how to add content editor, click here)

    b. paste the following code into the HTML Editor.

    //code

    <Style> 
    body #s4-leftpanel 
    { 
    display: none; 
    } 
    .s4-ca 
    { 
    margin-left: 0px; 
    } 
    </style> 
    c. save and close. it's done !

    2. for Share Point 2013


    a. Add a content editor Web Part(CWEP) to your page. (if you don't know how to add content editor, click here)

    b. paste the following code into the HTML Editor.

    //code

    <style>
    .ms-core-sideNavBox-removeLeftMargin{ DISPLAY: none }
    #contentBox { margin-left: 20px }
    </style>
    c. save and close. it's done !

    cheers ! 

    Tuesday, July 8, 2014

    Change save button to Send - SharePoint list

    *This post is for share point beginners.

    You may come across the situation where  you need to customize share point form elements.

    this is a workaround to change the default “Save” button to “submit” or any word, in the SharePoint list form such as NewForm.aspx without using info path or share point designer.


    A]For Share Point 2010 1) In your URL box, after NewForm.aspx (or EditForm.aspx,) add this text: ?toolpaneview=2 Your url should look like "http://mysite.com/mylist/NewForm.aspx?toolpaneview=2"


    2) Hit enter. The page will open in Shared editing mode. Choose "Add a Web Part" anywhere on the page.


    3) Add a Content Editor Web Part(CEWP). In the Text Source of the Content Editor Web Part, paste the following code:


    //code


    <script type="text/javascript">

    function changeOKButtons()
    {
     var inputs = document.getElementsByTagName("input");
     for(i = 0; i<inputs.length; i++)
     {
      if(inputs[i].type == "button" && inputs[i].value == "OK")
       inputs[i].value = "Submit";
     }
    }
    _spBodyOnLoadFunctionNames.push("changeOKButtons");
    </script>

    4)save and close. it's done !


    B]For Share Point 2013,

    1) Open NewForm.aspx
    2)click on Edit Page
    3)Add a Content Editor Web Part
    4)paste following code into it.

    <script src="https://ajax.googleapis.com/ajax/libs/jquery/1.3.1/jquery.min.js" type="text/javascript"></script>  

    <script>  
    $(document).ready(function()  
    {  
    $("input[value$='Save']").attr('value', "Your text here");  
    });  
    </script>